What?
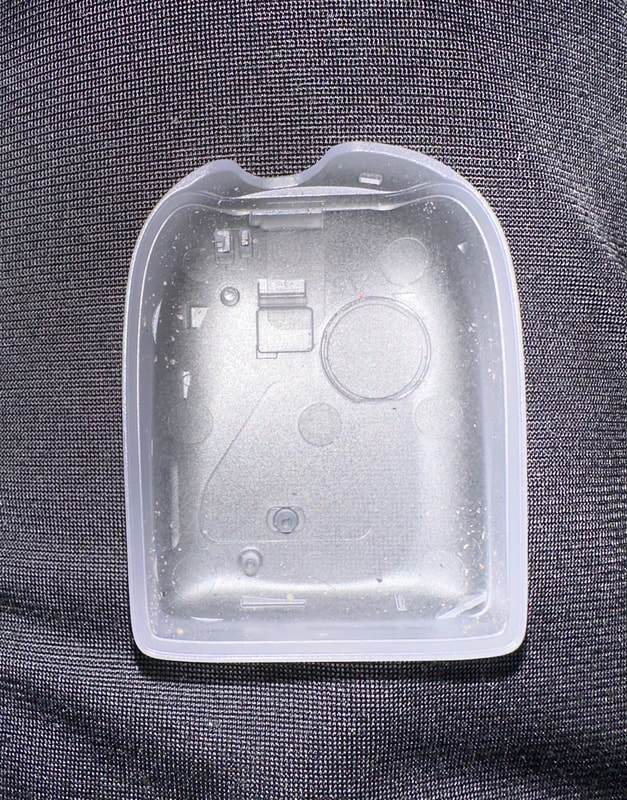
The picture depicted here is the top housing of the OmniPod, sold by Insulet Corporation. The problem I was trying to solve with the top housing had to do with welding a piezo to the energy director at the top right. There were false beeping coming from some products on the manufacturing floor, which caused the pods to be rejected. Because there was a higher reject frequency from a specific supplier, I was pulled in as part of the Supplier Development Engineering team to take a look at the part. I took samples of these parts from various suppliers, and performed metrological anaalysis on them to check if it was a specifications issue.
How?
I was responsible for finding the differences in measurements between suppliers to check if there was a noticeable difference between them, and if that was causing the issue. This was because one of our suppliers’ components was having a tougher time on the floor for this particular issue than another. I wrote a program for an OGP Gaging product to find various measurements along the underside of the part. After this, I used JMP in order to analyze the data.
There were a few issues along the way. The first was that the reference given in the drawing was not the same as how it was done on the floor. The reference drawing had it so that the height measurements were done from the bottom surface, using the edges as the reference plane. On the floor however, there was a different method which did not take the plane reference into account. The bottom surface of the component could not be used as a reference due to its curvature.
Due to this, we decided to also use reference point at the flattest part of the bottom surface, that being in the middle of the piezo weld, to be able to see if there was also a height or thickness problem with the reference plane from the top edges, while also using other dimensions such as the heights of the pins on the bottom left.
Results?
I left the company before we could gain the results of the project. What the drawn conclusion at the time was, while there was a difference between suppliers, it was not statistically significant enough to be an issue with the component, and the manufacturing team took over.
In this project, I ended up having to use some metrology and data analysis skills that I previously did not have. I used tools that I never had before, and learned how to solve particular issues by both coming up with some solutions of my own, like making an OGP program by myself and asking for help when I needed it, asking the expert engineers on how to come up with a better methodology of find the proper measurements.
In this project, I ended up having to use some metrology and data analysis skills that I previously did not have. I used tools that I never had before, and learned how to solve particular issues by both coming up with some solutions of my own, like making an OGP program by myself and asking for help when I needed it, asking the expert engineers on how to come up with a better methodology of find the proper measurements.


